

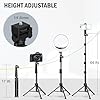
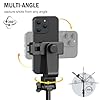


Liphisy 64” Tripod for Cell Phone & Camera, Phone Tripod with Remote and Phone Holder, Portable Tripod for iPhone, Phone Tripod for Video Recording, Cell Phone Tripod Mount Stand for Cellphone
18% Off


Echo Dot (5th Gen, 2022 release) | With bigger vibrant sound, helpful routines and Alexa | Charcoal
44% OffWelcome to our step-by-step tutorial on building a complete JavaScript project from start to finish. Whether you’re a beginner or an experienced developer, this guide will walk you through the entire process of creating a functional and polished JavaScript project. Let’s dive in!
Step-by-step project tutorial from start to finish
- Step 1: Project Planning and Setup
The first step is to plan your project. Define the project’s goals, features, and functionalities. Choose the right tools and technologies that suit your project requirements. Set up your development environment with a code editor, Node.js, and npm (Node Package Manager).
- Step 2: Project Structure and File Setup
Create a well-organized folder structure for your project. Decide on the layout for your JavaScript files, CSS, and assets. Having a clear and organized structure makes your project easy to maintain as it grows.
Example:
project-folder/
|- index.html
|- css/
| |- styles.css
|
|- js/
|- app.js
- Step 3: HTML and CSS Setup
Build the basic HTML structure of your project. Add the necessary CSS styles to create a visually appealing layout. Ensure your project is responsive and mobile-friendly.
- Step 4: JavaScript Functionality
Start adding JavaScript functionality to your project. Implement event listeners, handle user interactions, and create dynamic content. Utilize JavaScript libraries and frameworks if needed.
Example:
// app.js
const button = document.getElementById(‘myButton’);
const output = document.getElementById(‘output’);
button.addEventListener(‘click’, () => {
output.textContent = ‘Button Clicked!’;
});
- Step 5: Testing and Debugging
Thoroughly test your project for any bugs or issues. Use testing frameworks like Jest or Mocha to write unit tests for your JavaScript code. Debug and fix any errors that arise during testing.
- Step 6: Optimization and Performance
Optimize your project for performance. Minify your JavaScript and CSS files to reduce load times. Implement caching and utilize Content Delivery Networks (CDNs) for faster loading of external resources.
- Step 7: Final Polishing and Deployment
Perform a final review of your project, ensuring everything works as expected. Fine-tune the design and user experience. When you are satisfied with the project’s functionality and appearance, it’s time to deploy it to a live server or a hosting service.
Conclusion:
Congratulations! You have successfully built a complete JavaScript project from scratch. Starting with planning and setup, you developed the functionality, optimized performance, and deployed your project. Building complete projects is an excellent way to practice your JavaScript skills and showcase your abilities to potential employers or clients. So, keep exploring and building, and let your creativity shine through your JavaScript projects. Happy coding!


Etekcity Food Scale, Digital Kitchen Scale, 304 Stainless Steel, Weight in Grams and Ounces for Baking, Cooking, and Meal Prep, LCD Display, Medium
$13.99 (as of April 29, 2024 15:53 GMT +00:00 - More infoProduct prices and availability are accurate as of the date/time indicated and are subject to change. Any price and availability information displayed on [relevant Amazon Site(s), as applicable] at the time of purchase will apply to the purchase of this product.)


