Auto Amazon Links: No products found. Blocked by captcha.
Introduction
Getting user input is a crucial part of building interactive web applications. Forms allow you to collect data from users to store, process, and use in your web app. In this comprehensive guide, we will explore the various ways to get user input from HTML forms using JavaScript.
HTML Form Basics
Before diving into JavaScript, let’s briefly go over some HTML form basics. An HTML form contains interactive elements like text fields, checkboxes, radio buttons, submit buttons, etc. that allow users to enter data.
Here is a simple registration form example:
<form>
  <label for="username">Username:</label>
  <input type="text" id="username" name="username"><br>

  <label for="email">Email:</label>
  <input type="email" id="email" name="email"><br>

  <label for="password">Password:</label>
  <input type="password" id="password" name="password"><br>

  <input type="submit" value="Register">
</form>The <form> tag defines the form. Inside we have <label>, <input>, and <textarea> elements for each field. The name attributes will be used later in JavaScript to reference the fields.
Getting Form Input Values
Now let’s see how to get the values users entered into the form fields using JavaScript.
The input event
You can access the form fields as they are being filled out by attaching an input event listener:
const username = document.querySelector('#username');

username.addEventListener('input', (e) => {
  // e.target.value has the updated input
});The input event fires every time the value changes. So you can get the updated value from e.target.value inside the handler function.
Submit event
You usually want to get all the form values when the form is submitted. Attach a submit handler to the <form> element to achieve this:
const form = document.querySelector('form');

form.addEventListener('submit', (e) => {
  // stop form submitting
  e.preventDefault();

  const username = form.username.value;
  const email = form.email.value;
  const password = form.password.value;

  // do something with values
});Calling e.preventDefault() prevents the form from submitting and refreshing which allows you to process the values. The name attributes are used to reference the <input> elements and get their value.
FormData
Instead of manually retrieving each value, you can use the FormData API to collect all the values:
form.addEventListener('submit', (e) => {
  e.preventDefault();

  const data = new FormData(form);

  // data.get('username')
  // data.get('email')
  // data.get('password')
});Pass the <form> element to the FormData constructor. Then you can use the get() method to get the values by name.
Serialize the form
Another way is to use the serialize() function to encode the form values into a query string:
const data = new URLSearchParams(new FormData(form));

// data.get('username')
// data.get('email')
// data.get('password')This encodes the values similarly to query strings used in GET requests. The resulting string can be parsed into an object using data.entries() or appended to the URL.
Input Types and Events
Let’s go through some commonly used <input> types and how to handle them in JavaScript.
Text fields
Text fields can be single or multi-line:
<input type="text">
<textarea></textarea> Get their values on submit as shown earlier. You can also use input event to respond as the user types.
Checkboxes
Checkboxes allow multiple values to be selected:
<input type="checkbox" name="interests" value="music"> Music
<input type="checkbox" name="interests" value="sports"> SportsGet the values as an array:
const checkboxes = form.interests;

checkboxes.forEach(checkbox => {
  if(checkbox.checked) {
    selections.push(checkbox.value);
  }
});This loops through all checked checkboxes and collects their values in the selections array.
Radio Buttons
Radio buttons let the user select a single option from multiple ones:
<input type="radio" name="gender" value="male"> Male<br>
<input type="radio" name="gender" value="female"> FemaleGet the selected value:
const gender = form.gender.value;The name attribute groups radio buttons together so only one can be selected.
Select Dropdown
The select dropdown allows picking from multiple options:
<select name="city">
  <option value="nyc">New York</option>
  <option value="la">Los Angeles</option>
  <option value="chi">Chicago</option>
</select> Get the selected option’s value:
const city = form.city.value;For a multi-select dropdown, get an array of selected values like checkboxes.
Date Input
The date input allows selecting a date from a calendar popup:
<input type="date" name="birthday"> Get the date as a string in YYYY-MM-DD format:
const birthday = form.birthday.value;File Input
The file input allows users to select files from their device:
<input type="file" name="file">Access the list of files from files property:
const files = form.file.files;Then you can loop through the FileList and access each File object.
Submit Events
Along with the main form submit handler, you can also attach submit handlers to <input type="submit"> and <button> elements:
const submitBtn = document.querySelector('input[type="submit"]');

submitBtn.addEventListener('click', (e) => {
  // form submit logic
});This allows validating forms before submitting. If validation fails, call e.preventDefault() to prevent submission.
Sending Form Data
Now that you know how to access form values in JavaScript, let’s look at how to send them to a server.
Send as JSON
You can format the data into a JSON object and send it using fetch():
const data = {
  username: form.username.value,
  email: form.email.value
};

fetch('/register', {
  method: 'POST',
  headers: {
    'Content-Type': 'application/json'
  },
  body: JSON.stringify(data)
});The JSON body will be available in the request on the server.
Send as Form URLEncoded
To send the data as application/x-www-form-urlencoded, use the FormData API:
const data = new FormData(form);

fetch('/register', {
  method: 'POST',
  body: data
});FormData handles encoding the values properly.
Send files with Fetch
To upload files, you need to send a FormData object:
const data = new FormData();

data.append('file', form.file.files[0]);

fetch('/upload', {
  method: 'POST',
  body: data
});This will POST the selected file to the server.
Urlencoded string
You can also manually encode the data into an urlencoded string:
// Encode form values
const params = new URLSearchParams();
params.append('username', form.username.value);
params.append('email', form.email.value);

fetch('/register', {
  method: 'POST',
  headers: {
    'Content-Type': 'application/x-www-form-urlencoded'
  },
  body: params.toString()
});The toString() method creates the encoded string to send.
Traditional Form Submission
You don’t need JavaScript to submit a form – browsers can directly send the values for you.
Set the action attribute on the <form> and browsers will handle the rest:
<form action="/register">
  <!-- input fields -->
</form>When submitting this form, the browser will POST the values to the provided URL.
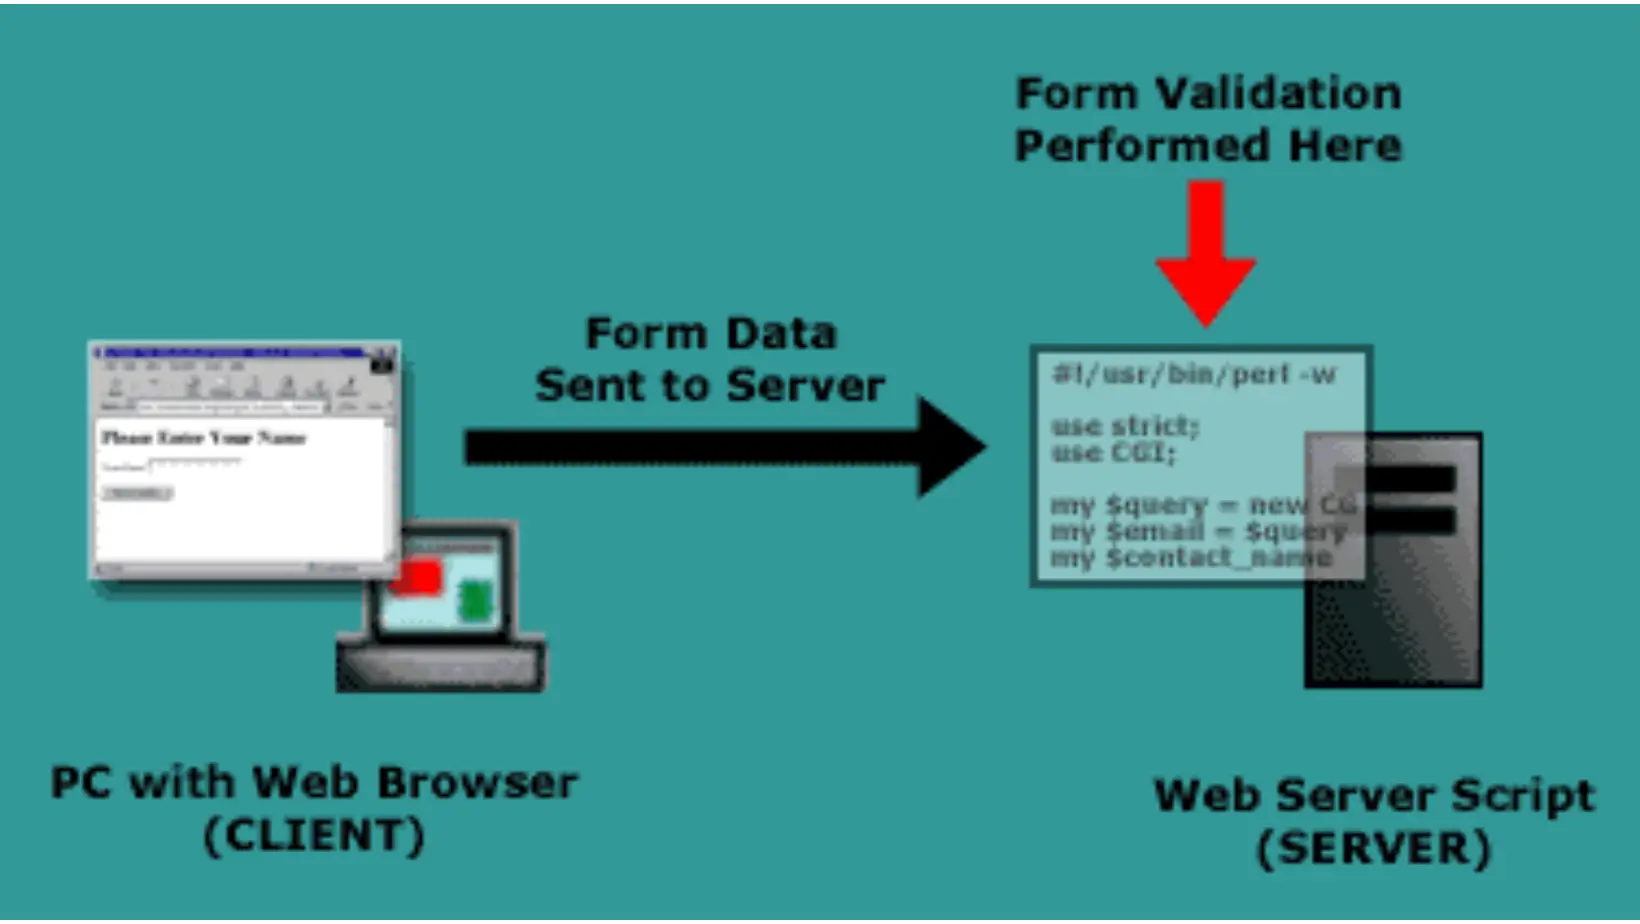
Client-Side Validation
Validating input before sending to a server is important to provide immediate user feedback. Here are some ways to validate forms with JavaScript.
HTML Validation
You can use some HTML validation attributes:
<input type="email" required>
<input type="url" minlength="5">These provide basic validation like enforcing a minimum length or requiring a field. Browsers will try to validate before submitting.
Using Constraint API
For more complex validation, you can use the Constraint Validation API:
// username field
const username = form.username;

// set custom validation
username.setCustomValidity('Username must be at least 5 characters');

// check if invalid
if(username.checkValidity() === false) {
  // handle error
}
Call setCustomValidity() to add a validation message. The form will not submit if any fields are invalid.
Pattern Attribute
The pattern attribute allows validating against a regex:
<input pattern="\d{5}">This will check if the input matches 5 digits.
event.preventDefault()
To manually validate on submit, check the values and call preventDefault():
form.addEventListener('submit', e => {
  if(form.username.value.length < 5) {
    e.preventDefault();
    alert('Invalid username');
  }
});This stops the form from submitting if username is too short.
Styling Invalid Fields
To provide visual feedback, style invalid fields using the :invalid and :valid pseudo-classes:
input:invalid {
  border: 1px solid red;
}

input:valid {
  border: 1px solid green;
}This shows a red border for invalid fields and green for valid ones.
You can also check input.validity.valid in JavaScript to add/remove classes.
Summary
- Use the submit event listener on the to get all values
- Access values using form.[name] or new FormData(form)
- Handle checkbox, radio, and select values properly
- Use fetch() or form submission to send data to server
- Validate forms before submission using built-in APIs
- Provide user feedback by styling invalid fields
This covers the main techniques for handling user input from HTML forms using JavaScript. Form validation and properly formatting and sending the data to your server is crucial for building working web applications.
Auto Amazon Links: No products found. Blocked by captcha.